
Reheated my coffee four times in one morning. Four. That’s the kind of day I was having when I realized I needed a treat that didn’t ask for oven time or brainpower.
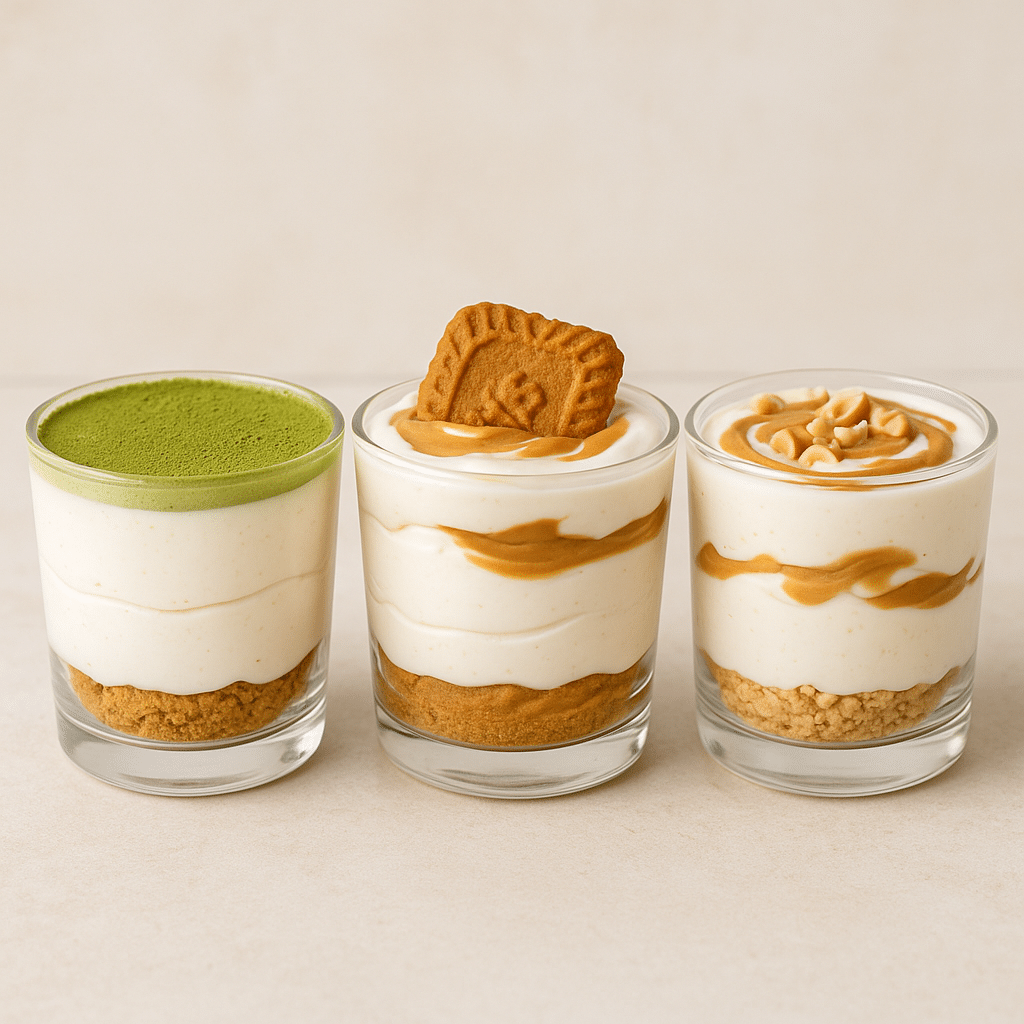
That’s where Layered Dessert Cups come in—no-bake, creamy, crunchy little lifesavers. Whether it’s matcha, Biscoff, or a sneaky protein cheesecake cup, they’re quick to make and even quicker to disappear.
Let’s layer some joy into your day, shall we?
Table of Contents
Table of Contents
Ingredients for Easy Layered Dessert Cups
Let’s talk about what makes these dessert cups both dreamy and doable. No need to scour fancy aisles—most of this is already in your kitchen.
Essential Ingredients You’ll Always Have on Hand
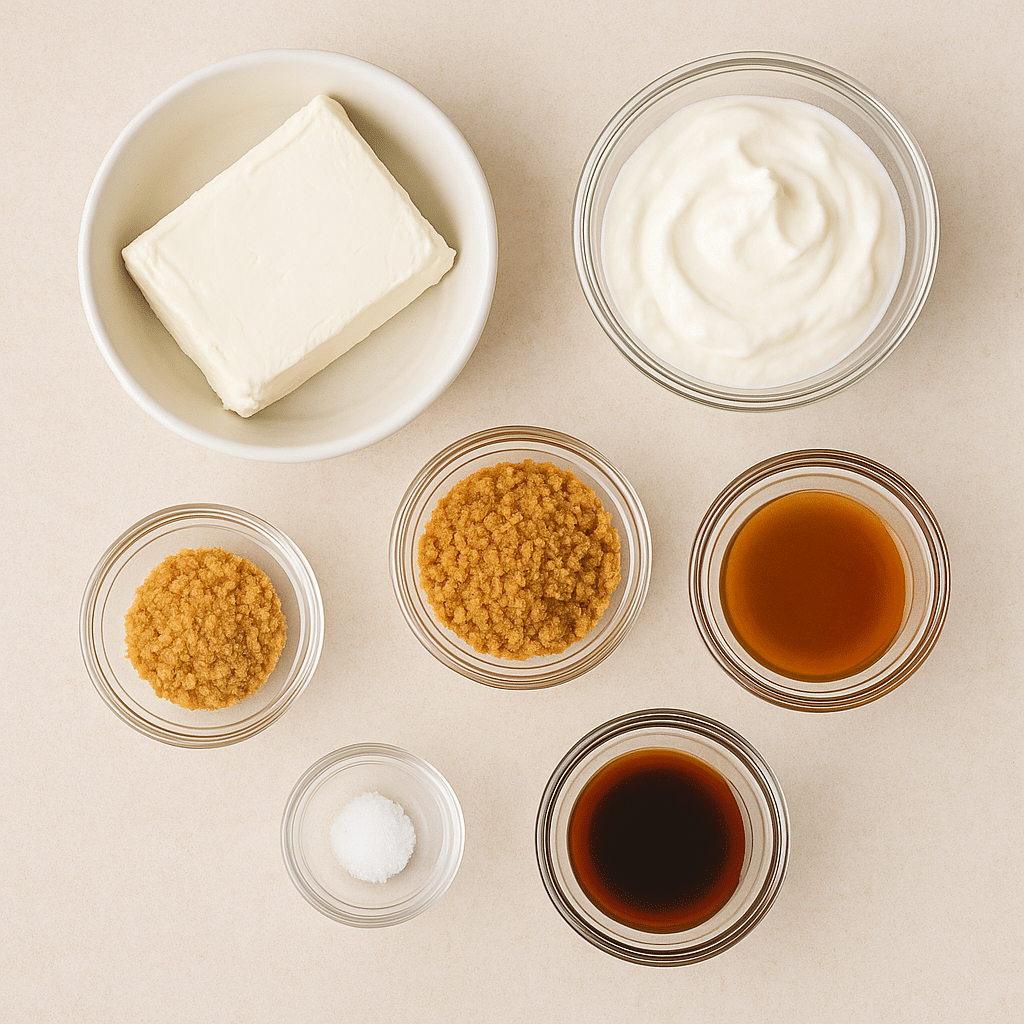
These are your Layered Dessert Cup building blocks:
- Cream cheese – the creamy base that holds everything together
- Greek yogurt or whipped cream – for a lighter, fluffier texture
- Honey or maple syrup – natural sweetness you can feel good about
- Crushed cookies or granola – crunch is non-negotiable
- Vanilla extract – for that warm, cozy flavor
- Pinch of salt – it makes everything pop
You can mix, match, and layer with whatever jars or cups you’ve got. Even a mason jar from the back of your pantry will do.
Flavor Add-ins for Matcha, Biscoff & Protein Cheesecakes
Here’s how to flavor your cups like a pro:
- Matcha Cheesecake Cups – Add 1 teaspoon matcha powder and a drizzle of honey
- Biscoff Cheesecake Cups – Swirl in melted Biscoff spread and crushed cookies
- Protein Cheesecake Cups – Mix in a scoop of vanilla protein powder and almond butter
No rules here—just layers of yum.
Step-by-Step Instructions for Layered Dessert Cups
These cups are as easy as mix, spoon, and chill. You don’t even need to turn on the oven. Just a few bowls, a spatula, and a little layering magic.
How to Build Perfect No-Bake Cheesecake Layers
- Make your creamy base – In a bowl, blend softened cream cheese, Greek yogurt (or whipped cream), sweetener, and a splash of vanilla until smooth and fluffy.
- Prepare your crust layer – Crush cookies, granola, or graham crackers. Mix with a little melted butter if you want that “cheesecake crust” vibe.
- Layer it up – Start with a spoonful of crust at the bottom, add a layer of the cream mixture, and repeat.
- Add toppings – Think crushed Biscoff, a dusting of matcha, or a swirl of almond butter.
- Chill – Pop them in the fridge for at least 2 hours so the flavors set and the texture gets dreamy.
Tips for the Best Texture in Every Spoonful
- Use full-fat cream cheese – for that rich, satisfying bite
- Let it soften first – so it blends like a dream and doesn’t clump
- Don’t skip the chill time – it’s what makes the layers set just right
- Layer in clear cups or jars – they look prettier and help you portion perfectly
These cups are forgiving, fun, and totally customizable—aka my kind of recipe.
Print
Easy Layered Dessert Cups You Can Make in Your Sleep
- Total Time: 10
- Yield: 4 cups 1x
- Diet: Vegetarian
Description
No-bake layered dessert cups with creamy cheesecake filling and customizable flavors like matcha, Biscoff, and protein-rich options.
Ingredients
1 cup cream cheese, softened
1/2 cup Greek yogurt or whipped cream
2–3 tbsp honey or maple syrup
1 tsp vanilla extract
1 cup crushed cookies or granola
Pinch of salt
Optional add-ins: matcha powder, Biscoff spread, protein powder
Instructions
1. Blend cream cheese, yogurt, sweetener, and vanilla until smooth.
2. Crush cookies or granola and prepare optional mix-ins.
3. Spoon a layer of crumbs into each jar or cup.
4. Add a layer of the cheesecake mixture.
5. Repeat layers, ending with toppings of choice.
6. Chill for at least 2 hours before serving.
Notes
Make up to 2 days ahead.
Add crunchy toppings just before serving.
For best presentation, use a piping bag for layers.
Customize with your favorite spreads, powders, or nut butters.
- Prep Time: 10
- Category: Dessert
- Method: No-Bake
- Cuisine: American
Nutrition
- Serving Size: 1 cup
- Calories: 220
- Sugar: 12g
- Sodium: 180mg
- Fat: 12g
- Saturated Fat: 6g
- Unsaturated Fat: 4g
- Trans Fat: 0g
- Carbohydrates: 20g
- Fiber: 1g
- Protein: 6g
- Cholesterol: 35mg
Variations to Try
Layered Dessert Cups are like a blank canvas—once you’ve got the base down, the flavor possibilities are endless. Here are a few favorites that always get rave reviews (and zero leftovers).
If you’re looking for a cozy treat that feels like a warm hug, check out this Cherry Cheesecake Dump Cake. Simple, nostalgic, and perfect for sharing.
Matcha Cheesecake Cups: Earthy & Elegant
Matcha lovers, this one’s for you. The slight bitterness of the matcha balances beautifully with the creamy sweetness of the cheesecake layer.
How to make it:
- Add 1 teaspoon of sifted matcha powder to your cream cheese mixture.
- Sweeten with honey or maple syrup to taste.
- Top with crushed graham crackers or white chocolate shavings for a little crunch.
Pro tip: Use ceremonial-grade matcha if you can—it gives a vibrant color and a smooth, grassy flavor.
Biscoff Cheesecake Cups: Spiced & Sweet
If you’ve never swirled Biscoff spread into cream cheese, you’re in for a treat. These cups taste like fall in a spoon.
How to make it:
- Stir 2 tablespoons of Biscoff spread into your cream cheese base.
- Layer with crushed Biscoff cookies.
- Top with an extra dollop of spread and a sprinkle of cinnamon.
Pro tip: Microwave the Biscoff spread for a few seconds to make swirling easier and prettier.
High-Protein & No-Bake Options
If you’re aiming to balance indulgence with a bit of nutrition, or you just don’t want to deal with an oven, these variations have your name written all over them.
Protein Cheesecake Cups: Guilt-Free & Filling
These are perfect post-workout treats or anytime snacks that keep you full without feeling heavy.
How to make it:
- Add 1 scoop of your favorite vanilla or plain protein powder to the cream cheese base.
- Use Greek yogurt for extra protein and creaminess.
- Sweeten with stevia or a little maple syrup.
- Layer with almond butter, chopped nuts, or crushed high-protein cookies.
Pro tip: Let the mixture sit for a few minutes before layering—it thickens up for better structure.
No-Bake Cheesecake Cups: Chill, Spoon, Smile
This is the base version—no oven, no fuss. Just layer and chill.
How to make it:
- Mix softened cream cheese, Greek yogurt, honey, and vanilla until smooth.
- Layer with any crushed cookies or fruit preserves.
- Chill for at least 2 hours before serving.
Pro tip: Add a splash of lemon juice to brighten up the flavor—it cuts the richness just enough.
Tips to Make Layered Dessert Cups Like a Pro
Making these dessert cups is simple—but with a few tricks, your Layered Dessert Cups will look bakery-worthy and taste even better.
Storage & Make-Ahead Tips
These Layered Dessert Cups are fridge-friendly and make-ahead approved. That means less work when guests show up or cravings hit.
- Make up to 2 days in advance—just keep them covered in the fridge
- Use jars with lids for easy stacking and storing
- Hold off on crunchy toppings like granola or crushed cookies until just before serving
- Freeze (without toppings) for up to a month and thaw overnight in the fridge
How to Keep Layers Clean and Pretty
If you want your Layered Dessert Cups to look as good as they taste, it’s all about the technique:
- Use a piping bag or zip-top bag with the corner snipped to keep lines clean
- Wipe the inside of the jar with a paper towel if you get smudges
- Tap the jar gently on the counter to settle each layer before adding the next
- Use color contrast—like white cheesecake with matcha green or golden Biscoff—for eye-catching layers
Even if the kids help out (mine always want to “build their own”), these still turn out gorgeous. And honestly? A little mess just means it’s made with love.
FAQ : Your Top Layered Dessert Cups
Can I make these the night before?
Absolutely. In fact, they’re even better after a few hours in the fridge. The layers firm up, and the flavors mingle in the best way. Just hold off on adding crunchy toppings until you’re ready to serve.
What’s the best jar or cup to use?
Small mason jars, clear glass cups, or even reused yogurt containers work great. The key is something transparent so those pretty layers can shine. Look for 4 to 8-ounce sizes for perfect portions.
How long do they last in the fridge?
They stay fresh for up to 3 days if covered tightly. Just make sure to store them without perishable fruit toppings if you’re prepping ahead.
Can I freeze layered dessert cups?
Yes! You can freeze them (without toppings) for up to a month. Thaw overnight in the fridge, then top and serve. Note: the texture may be slightly softer, but still delicious.
The Sweetest Way to End Your Day
There’s something deeply satisfying about grabbing a spoon and digging into creamy layers you made yourself—especially when you didn’t have to bake a thing. Whether it’s a matcha moment, a Biscoff craving, or a protein-packed pick-me-up, these Layered Dessert Cups check all the boxes: fast, fun, and full of flavor.
They’re the kind of treat that makes you feel like you’ve got it together—even if your coffee’s gone cold for the fourth time.
looking for more wellness-friendly recipes and cozy kitchen inspo? See more on my Pinterest. I pin all my favorites there, including morning drinks, lightened-up comfort food, and feel-good treats you can make in minutes!
Lightened up, but never short on flavor.